Backup Amazon EC2 Linux box to S3 Storage
I'm looking for a simple and cheap way to backup my web servers to disk and there are obviously some options. SpiderOak has a free low tier and although it has certain features, such as full encryption and various ways to get at your data, I have found it to be unreliable, sometimes it never finishes and requires a machine reboot. Also, it never deletes anything so as time goes by, your allowance is eaten up and attempting to delete these old versions using the command line, although simple in theory, seems to lock up or fail more often than not.
I thought I would set up a backup from the boxes directly to S3 storage which is cheap and local to the AWS boxes.
I thought I would set up a backup from the boxes directly to S3 storage which is cheap and local to the AWS boxes.
1) Get the box in a known-good state, install s3cmd and take a snapshot.
This is just good practice. Before I start mucking around with things, if I back everything up as a snapshot, I can go back to the start if I get anything wrong. So:
> sudo apt-get update && sudo apt-get upgrade
> sudo apt-get install s3cmd
> sudo reboot now
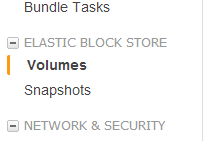
Next, go into your AWS management portal and click on Volumes under the Elastic Block Store:
Select the volume that is attached to your instance (you can see this in the Attachment Information column) and under the actions menu, choose Create Snapshot. This happens as a background process, so you don't need to wait for it.
2) Setup Amazon S3 and get the credentials
Skip this section if you already have S3 setup and you know the credentials (you might however want to create an additional bucket for your backups)
Click on the S3 icon in the AWS management portal, either from the front page or under the Services Menu. If you have not already done so, click Create Bucket and give it a useful name. When choosing a region, it will be cheaper and quicker to use the same region as your instances but it will be much more secure to write it to another region so the chance of losing the server and the storage at the same time is much lower. Personally, I prefer the local faster option and will take a chance on the whole data center not getting destroyed! (You could also run a job to duplicate the bucket to another region but I'm not going to do that here).
It is good practice to add a user just for uploading backups. This user can be restricted to an appropriate level so that it someone compromised the machine/user the damage they could do is limited. By default, I will not allow this user to view, only to upload. I can add the view permission if I ever need to restore from backup.
To add a new user, click on the IAM icon under the services menu, which opens the Identity and Access Management control panel. Click on Users and Create New Users. Enter a name (such as backup) and copy the access key and secret key from the dialog that comes up. Note that these keys are like passwords. Do not publish them and do NOT put them in source code in a public repository. It has happened and attackers can find them and sometimes use them to create instances (often for Bitcoin mining!) at your expense. Note that you cannot re-download these, so if you haven't copied or downloaded them, you would need to recreate them at a later date.
You can now create a group and give it access to your S3 bucket. This makes it easier to add additional users later on for other machines. Click Groups and Create New Group. Give it a name (like backup) and then press Continue. The next page links this group to certain permissions on a certain resource. You could use a present template but the policy generator option allows more fine-grained control so click that radio button and press Select. As with many permissions, this allows an allow or a deny policy to be created. Since this is our first policy, we will choose Allow and then select Amazon S3 as the AWS Service. Under actions, I selected Put Object, Delete Object, List Objects, Get Object and List Bucket. I'm not sure yet whether all of these are required but you definitely need List Bucket for the s3cmd setup to work. Once you have chosen the actions, you need to specify which resource these permissions apply to using Amazon Resource Notation. In this case, the format is arn:aws:s3:::bucketname where bucketname is the bucket you created earlier. You need to extend this for the sub directories of the bucket name but rather than adding another nearly identical statement, we will edit the policy after the group is created.
Once the statement has been added, you will need to add a global permission since s3cmd needs to be able to list all buckets. Use 'Allow', 'Amazon S3' and ListAllMyBuckets for the Action. In the resource name, put arn:aws:s3:::* and then click Add Statement.
Once you press Continue and the group is created, we need to edit part of the permission policy since the permissions only currently apply to the bucket itself, not its contents. Click the Permissions tab at the bottom and next to the first policy statement, click Manage Policy. This should bring up an editor that has the permissions for the resource arn:aws:s3:::bucketname. Edit the resource block and add a comma after the existing entry and add another entry for "arn:aws:s3:::bucketname/*" so it looks like this:
"Resource": [
"arn:aws:s3:::bucketname",
"arn:aws:s3:::bucketname/*"
]
And press Apply Policy
Once the policy is updated, select it and click the Users tab at the bottom and Add Users to Group. Add the user you created earlier. This should be all you need to access your storage account using those user credentials.
3) Setup s3 tools on your box
> s3cmd --configure
Enter your access key and secret followed by an encryption password. Encryption will be slower but you should never really trust a cloud storage unit to be secure from either nosey governments or people who might find a vulnerability in the cloud service. Enter the path to gpg (I selected the default), also say Yes to https. It is obviously important to test access so allow s3 tools to do this and fix any errors you get.
If you get a 403, you might not have setup the permissions correctly or, obviously, you might have mistyped your key and secret. If all goes well, you should see something like:
Please wait...
Success. Your access key and secret key worked fine :-)
Now verifying that encryption works...
Success. Encryption and decryption worked fine :-)
> Save settings? [y/N] y
Configuration saved to '/home/ubuntu/.s3cfg'
That should be the setup finished correctly.
4) Setup your sync
s3cmd acts a bit like an FTP program and can copy, delete, list objects and buckets etc. Most of these commands are very intuitive (and full details can be found here):
List buckets
> s3cmd ls
Copy between buckets
> s3cmd cp s3://bucket1 s3://bucket2
Upload (put) local file into s3 bucket
> s3cmd put filename s://bucketname
Download a file
> s3cmd get s3://bucket/filename localfilename
But most importantly for us is probably the sync command:
> s3cmd sync directory s3://bucket/
This will initially upload all files from the directory but then only new or changed files. If you want to delete remote files that have been deleted locally, use the --delete-removed option.
Note that sync does NOT use encryption currently. If you want encryption, you need to use put with the -e and --recursive options. I will write another post if I can work out a practical backup solution which includes encryption, only uploads increments (i.e. only the changes) and allows easy storage of multiple backups (perhaps each day for a week and then 4 weeks and then 3 months etc).